Windows 8.1

How to Add Application to the Windows Right-Click Menu

Posted on


If you want to access a frequently used application quickly, there is a way to add that application to the Windows Desktop Right Click Menu through a simple registry hack. Here the steps….:)

11

Open Registry Editor

1

Go to the following key.

HKEY_CLASSES_ROOT\Directory\Background\shell

2

Create a Key and give name to the key as what you want on the menu.

3

Here am going to add VMware Workstation to the menu so named as VMware

4

Create another key Named as Command in lower case. This key is holding the command for launching application.

5

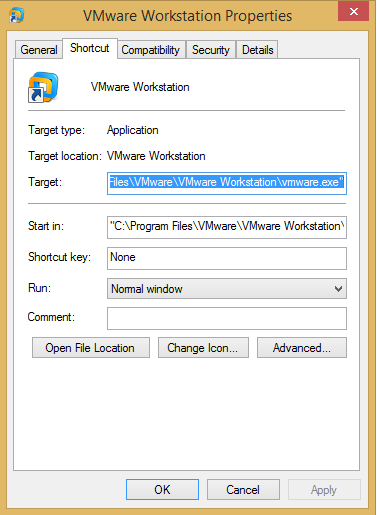
Copy the full path of the application which u want to launch from the properties of program shortcut.

8

Paste the path as the value data for the Command Key click ok and exit from the Registry Editor

9

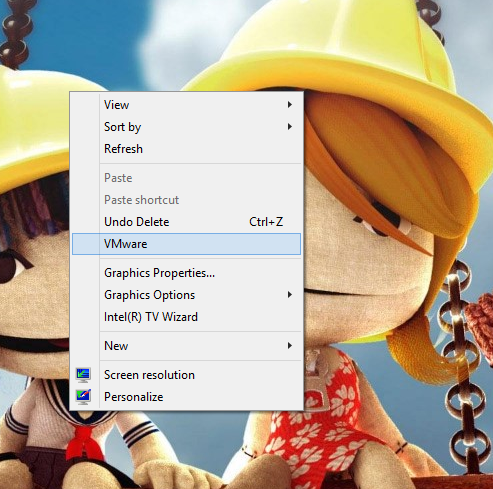
From Desktop you can access the program by right clicking

10

Add your Personal Folder to Send to Menu.

Posted on


In Windows 8 and 8.1 we can send files to our Personal folders by adding that folders into the send to menu. Here sharing the steps for how add the personal folders to send to menu.

1

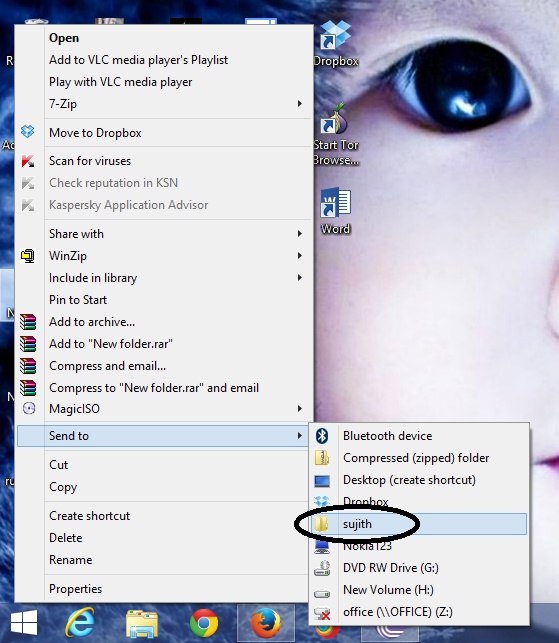
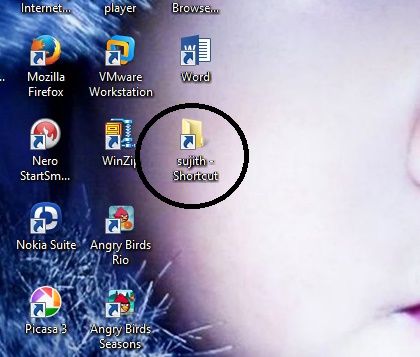
Open the folder which you want to add into the Send to menu. Right click the folder and send to desktop for creating a shortcut on Desktop.

2

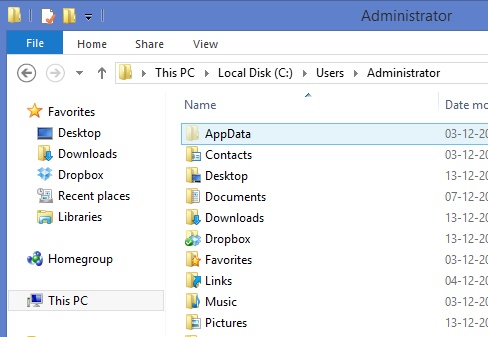
Copy the shortcut to My Computer > C: > Users > (Your User Account) > AppData > Roaming > Microsoft > Windows > SendTo

3

 Normally the AppData folder will be in hidden format.

4

For viewing the hidden files Click on View and check the Hidden items

5

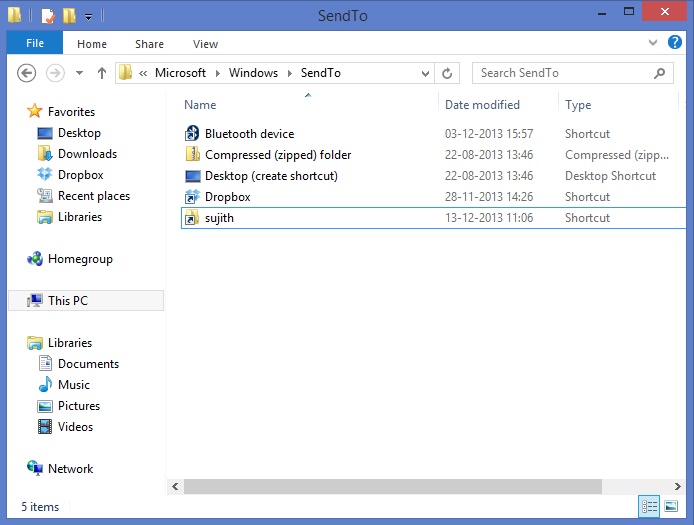
Then open folder Send to and paste the Shortcut.

6

Here Opened the the Folder AppData > Roaming > Microsoft > Windows SendTo and copied the shortcut from the desktop. Renamed it as sujith

8

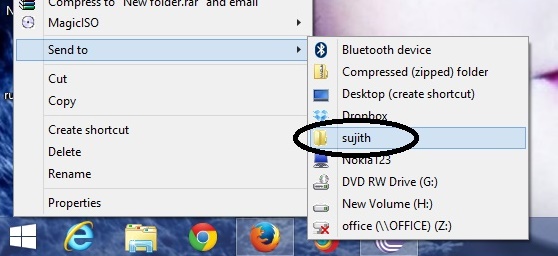
Select any File and sent to your personal folder now.

9

How to Solve error: This app can’t be activated by the Built-in Administrator in Windows 8.1

Posted on Updated on


In Windows 8 and Windows 8.1, if you are using built-in Administrator account You can’t use some apps. We will get a error message that This app can’t use by built-in administrator or This app can’t be activated by the built-in administrator. Here the steps or solving this error.

Screenshot (18)

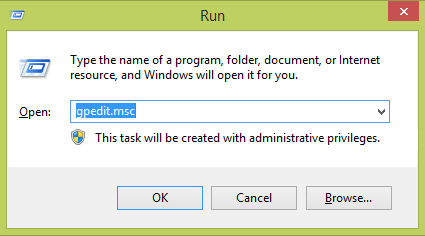
Open Group Policy Editor from Run

Windows + R

gpedit.msc

2

From Local Group Policy Editor Navigate to

3

Windows Settings > Security Settings > Local Policy > Security Options

4

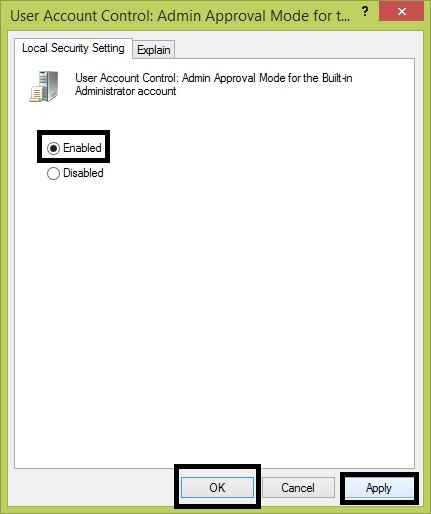
Enable the Policy User Account Control: Admin Approval Mode for the Built-in Administrator Account

5

Double click on the policy and Check Enabled then Apply > OK

6

Just Restart your PC and check. You can use the apps from Built-in Administrator account the error will not appear again.

Remove Library Folders from My computer in Windows 8.1

Posted on


In Windows 8.1, while we open My Computer we can see the library files like Downloads, Music, Pictures, Documents, and Videos. Also it can be accessed from the left side bar so Here we are going to remove the library files from My Computer for the easy access of Disk drives.

4

Step 1

Open Registry Edit from Run

Windows + R

Type regedit > Enter

1

Step 2

From Registry Editor navigate to HKEY_LOCAL_MACHINE\SOFTWARE\Microsoft\Windows\Current Version\explorer\MyComputer\NameSpace.

2

{1CF1260C-4DD0-4ebb-811F-33C572699FDE}             Music Folders

{374DE290-123F-4565-9164-39C4925E467B}              Downloads Folders

{3ADD1653-EB32-4cb0-BBD7-DFA0ABB5ACCA}       Pictures Folders

{A0953C92-50DC-43bf-BE83-3742FED03C9C}           Vedios Folders

{A8CDFF1C-4878-43be-B5FD-F8091C1C60D0}           Documents Folders

{B4BFCC3A-DB2C-424C-B029-7FE99A87C641}          Desktop Folders

From here we can see Six keys which representing the library folder. Delete the keys individually or delete the six keys for removing the library files from My Computer.

3

Here we deleted the keys

5

See that the Library Files are removed from My Computer

6

Upgrade your Windows 7 PC to Windows 8.1

Posted on


Finally Windows 8.1 is released and its time for upgrading from your old operating system to Windows 8.1. Here is the steps for upgrading from Windows 7 to Windows 8.1.

Insert Windows 8.1 installation disk and open My Computer.

Windows 7-2013-11-24-12-24-57

CD/DVD Drive > Right Click > Open Autoplay

Windows 7-2013-11-24-12-26-04

Up gradation is started now. Check No, thanks because it require more time for installation. You have options for updating after completing upgradation.

Click Next

Windows 7-2013-11-24-12-27-53

Agree the license terms by clicking Accept.

Windows 7-2013-11-24-12-28-25

If you want your personal files check Keep personal files only > Next

Windows 7-2013-11-24-12-28-29

Click on Install to start the upgradation.

Windows 7-2013-11-24-12-29-21

Here the upgradation is started now.

Windows 7-2013-11-24-12-29-29

Windows 7-2013-11-24-12-39-58

Windows 7-2013-11-24-12-53-22

Select color you want  and Next.

Windows 7-2013-11-24-13-04-38

Here am selecting Use express settings. If you want customize your settings select Customize.

Windows 7-2013-11-24-13-04-44

Now we can see the Log in screen of Windows 8.1. Sign in with your windows 7 user account.

Windows 7-2013-11-24-13-05-37

Windows 7-2013-11-24-13-05-48

Upgradation is successully completed.

Windows 7-2013-11-24-13-11-21

How to setup a picture password in Windows 8.

Posted on Updated on


Use a picture password to log into your computer. Windows 8 includes a new feature called Picture password, which allows you to authenticate with the computer using a series of gestures that include circles, straight lines, and taps. Enable this feature if you want a new way to access your computer or have a hard time with passwords.

Open the Windows Charms.Click Settings and then More PC settings In the PC settings  window click Users and then select Create a picture password.

Step I

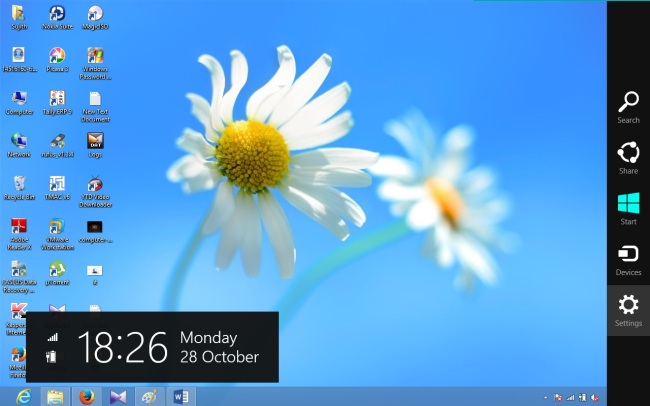
  • Open Windows Charms > Settings.

Image

Step II

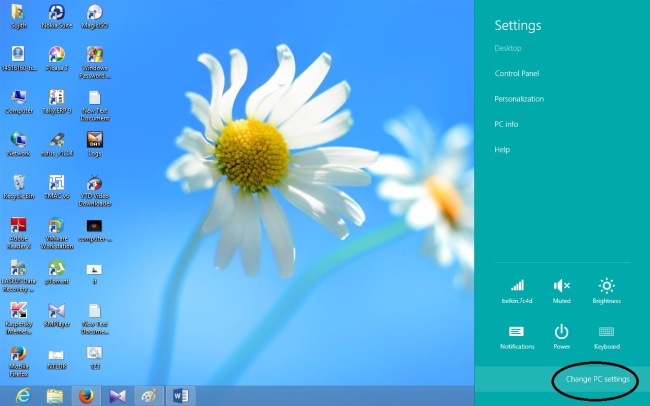
  • Click on Change PC Settings

Image

Step III

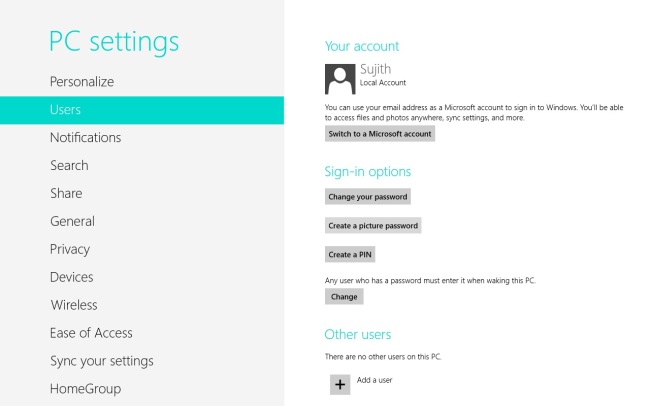
  • Select Users >
  • Click > Create a Picture Password

Image

Step IV

  • Enter your Password > OK   (if you already setup)

Image

Step V

  • Choose Picture

Image

Step VI

  • Open the Picture File From your system.
  • Click Open

Image

Step VII

  • Click ‘Use this picture’

windows6

Step VIII

  • Draw three gestures on your picture. You can use any combination of circles, straight lines, and taps.
  • Remember, the size, position, and direction of your gestures and the order in which you make them become part o your picture password…

windows7

Step IX

  • So its finished ya…

windows8